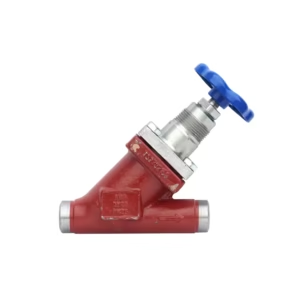
Proper pressure relief valve sizing ensures the valve can discharge enough flow to prevent dangerous over-pressurization while avoiding the problems of oversized or undersized valves. An undersized relief valve cannot protect your system—it will simply blow open and stay open while pressure continues rising. An oversized valve may chatter, leak, or fail to open at all due to insufficient flow velocity.
Relief valve sizing is not guesswork, and it’s not simply “match the pipe size.” It’s a technical process governed by established codes and standards (API 520/521, ASME, ISO) that considers fluid properties, flow conditions, pressure requirements, and discharge scenarios. Get it wrong, and you’ve installed a valve that provides a false sense of security while leaving your equipment vulnerable to catastrophic failure.
Whether you’re sizing a relief valve for a water heater, boiler, pressure vessel, or process system, this guide walks you through the critical factors, calculations, and selection process to ensure proper protection.
Table of Contents
ToggleWhy Relief Valve Sizing Matters
The Consequences of Wrong Sizing
Undersized Relief Valve
What happens:
- Valve opens but cannot discharge enough flow
- Pressure continues rising despite open valve
- System exceeds design pressure
- Equipment fails catastrophically
Real-world example:
Boiler rated 150 PSI, relief valve set at 150 PSI
Boiler produces steam faster than relief can discharge
Pressure rises to 200+ PSI despite relief wide open
Boiler explodes
Oversized Relief Valve
What happens:
- Disc doesn’t lift fully at normal relief flow
- Valve operates in unstable region
- Chattering damages valve and creates noise
- Premature seat wear
- May not seal properly after opening
Real-world example:
Water heater needs 30 GPM relief capacity
Installer uses 100 GPM valve "to be safe"
Thermal expansion creates only 5 GPM flow
Valve lifts slightly, chatters, leaks
Constant dripping ruins valve, wastes water
The Goldilocks Principle
Relief valves must be “just right”:
- Large enough to handle required relief flow
- Small enough to operate in stable, efficient range
- Matched to actual system conditions
Key Sizing Parameters
Before sizing any relief valve, you must know these critical parameters:
1. Required Relieving Capacity
Question: How much flow must the valve discharge?
This depends on the relief scenario:
| Scenario | Typical Flow Source |
|---|---|
| Thermal expansion | Volume increase from heating blocked liquid |
| Fire exposure | Fluid vaporization from external fire |
| Runaway reaction | Chemical reaction generating gas/vapor |
| Heat exchanger failure | High-pressure fluid entering low-pressure side |
| Blocked outlet | Full pump capacity with no flow path |
| Control failure | Maximum input with no outlet |
Critical point: You must identify the worst-case scenario that produces maximum required relief flow.
2. Set Pressure
Definition: The pressure at which the valve begins to open (crack pressure)
Guidelines:
- Must not exceed Maximum Allowable Working Pressure (MAWP) of vessel
- Typically set at 90-100% of MAWP
- For ASME vessels: usually set AT the MAWP
- Consider operating pressure (should be well below set pressure)
Example:
- Vessel MAWP: 150 PSIG
- Normal operating pressure: 100 PSIG
- Relief valve set pressure: 150 PSIG
3. Allowable Overpressure
Definition: How much pressure can exceed set pressure during relief
ASME Code allowances:
- Normal operation: 10% overpressure (165 PSIG for 150 PSIG set)
- Fire case: 21% overpressure (181 PSIG for 150 PSIG set)
This determines the accumulation the valve must handle.
4. Back Pressure
Definition: Pressure in the discharge system
Types:
- Superimposed: Exists before valve opens (from other sources)
- Built-up: Created by valve’s own discharge
Impact: High back pressure reduces valve capacity and may require balanced bellows design
5. Fluid Properties
For liquids:
- Specific gravity
- Viscosity
- Temperature
For gases/vapors:
- Molecular weight
- Compressibility factor (Z)
- Specific heat ratio (k)
- Temperature
Critical: Some fluids require special calculations or valve materials
Relief Valve Sizing Methods
Different fluids require different sizing approaches.
Sizing for Liquids
Liquid relief valve sizing uses this basic formula:
Q = A × K × √(ΔP / G)
Where:
- Q = Flow rate (GPM)
- A = Effective discharge area (in²)
- K = Discharge coefficient (typically 0.65)
- ΔP = Pressure differential (set pressure – back pressure, PSI)
- G = Specific gravity (water = 1.0)
Step-by-Step Liquid Sizing
Step 1: Determine Required Flow (Q)
Calculate worst-case relief flow:
Thermal expansion example:
Blocked water line, 40°F to 140°F temperature rise
100 feet of 2" pipe

Volume expansion ≈ 100 ft × coefficient × ΔT
Flow through relief = expansion rate
Required Q = 15 GPM
Step 2: Calculate Pressure Differential
Set pressure: 150 PSIG
Back pressure: 5 PSIG (atmospheric + pipe resistance)
ΔP = 150 - 5 = 145 PSI
Step 3: Determine Specific Gravity
Water at 140°F: G ≈ 0.98
Step 4: Calculate Required Area
Q = A × K × √(ΔP / G)
15 = A × 0.65 × √(145 / 0.98)
15 = A × 0.65 × 12.15
A = 1.90 in²
Step 5: Select Valve Size
Consult manufacturer’s capacity tables for valve with effective area ≥ 1.90 in² at specified set pressure.
Typical result: 1″ × 1-1/2″ relief valve
Sizing for Gases and Vapors
Gas/vapor sizing is more complex due to compressibility effects.
Basic gas formula (critical flow):
W = C × K × A × P₁ × √(M / (Z × T))
Where:
- W = Flow rate (lb/hr)
- C = Constant based on gas properties
- K = Discharge coefficient
- A = Effective area (in²)
- P₁ = Relieving pressure (PSIA)
- M = Molecular weight
- Z = Compressibility factor
- T = Temperature (°R)
Simplified Approach for Steam
For saturated steam:
W = 51.5 × A × P₁ × K
Where:
- W = Steam flow (lb/hr)
- A = Effective area (in²)
- P₁ = Set pressure + overpressure (PSIA)
- K = Correction factor (Napier factor)
Example:
Required steam relief: 10,000 lb/hr
Set pressure: 100 PSIG (114.7 PSIA)
Overpressure: 3% (118 PSIA)

W = 51.5 × A × 118 × 1.0
10,000 = 51.5 × A × 118
A = 1.65 in²

Select valve with area ≥ 1.65 in²
API 520/521 Standard Method
For process industry applications, API standards provide detailed procedures:
API 520 Part I: Sizing and selection API 521: Guide to pressure relief and depressuring systems
These cover:
- Fire scenarios (external fire on vessel)
- Thermal expansion in blocked liquids
- Gas blowdown calculations
- Two-phase flow conditions
- Reaction scenarios
Sizing Charts and Tables
Water Relief Valve Sizing Chart
For water at 100°F, 150 PSIG set pressure:
| Valve Size (Inlet × Outlet) | Rated Capacity (GPM) | Effective Area (in²) |
|---|---|---|
| 1/2″ × 3/4″ | 8 | 0.110 |
| 3/4″ × 1″ | 26 | 0.307 |
| 1″ × 1-1/4″ | 59 | 0.785 |
| 1-1/4″ × 1-1/2″ | 108 | 1.227 |
| 1-1/2″ × 2″ | 176 | 1.838 |
| 2″ × 2-1/2″ | 320 | 3.142 |
Note: Actual capacities vary by manufacturer and model
Steam Relief Valve Sizing Chart
For saturated steam, set pressure 100 PSIG:
| Valve Orifice | Area (in²) | Capacity (lb/hr) |
|---|---|---|
| D | 0.110 | 668 |
| E | 0.196 | 1,191 |
| F | 0.307 | 1,865 |
| G | 0.503 | 3,056 |
| H | 0.785 | 4,770 |
| J | 1.287 | 7,817 |
| K | 1.838 | 11,168 |
Boiler Relief Valve Sizing
Minimum required capacity (ASME Section I):
For boilers:
- Capacity must equal or exceed maximum steam generation rate
- Based on maximum burner input or heat release
- Multiple valves may be used (largest must be ≥67% of total)
Quick estimate:
Required capacity (lb/hr) = Boiler HP × 34.5

Example:
100 HP boiler
Required capacity = 100 × 34.5 = 3,450 lb/hr
Select orifice "G" (3,056 lb/hr) + additional capacity
Special Sizing Considerations
Fire Case Sizing
When vessels are exposed to fire, dramatic increases in vapor generation occur.
API 521 fire case formula:
Q = C × F × A^0.82
Where:
- Q = Required relief rate (GPM or lb/hr)
- C = Constant depending on fluid
- F = Environment factor
- A = Wetted surface area (ft²)
Key points:
- Fire dramatically increases relief requirements (10× normal is common)
- Wetted surface area is critical parameter
- Insulation significantly reduces required capacity
- Often the governing case for sizing
Two-Phase Flow
When liquid flashes to vapor during relief (most challenging scenario):
Challenges:
- Neither pure liquid nor pure vapor equations apply
- Flow regime affects capacity
- Requires specialized calculation methods
- Often requires larger valve than pure liquid or gas
Approaches:
- Omega method (API 520)
- Homogeneous equilibrium model
- Specialized software (ProMax, Aspen, etc.)
Conservative approach: Size for liquid flow, verify adequate for vapor
Thermal Expansion in Blocked Liquid Lines
Common in process piping and water systems:
Formula:
Q = β × V × ΔT / t
Where:
- Q = Relief flow rate
- β = Volumetric expansion coefficient
- V = Trapped volume
- ΔT = Temperature rise
- t = Time for temperature rise
Water thermal expansion:
β = 0.0004 per °F (approximate)

100 gallons water trapped
Temperature rise 40°F to 140°F (100°F increase)
Time = 1 hour

Q = 0.0004 × 100 × 100 / 1
Q = 4 gallons/hour = 0.067 GPM

Small valve required (1/2" adequate)
Selection Process: Step-by-Step
Step 1: Define the System
Document:
- [ ] Equipment protected (vessel, piping, heat exchanger)
- [ ] Design pressure (MAWP)
- [ ] Normal operating pressure
- [ ] Operating temperature
- [ ] Fluid properties (specific gravity, molecular weight, etc.)
Step 2: Identify Relief Scenarios
List all credible overpressure scenarios:
- [ ] Blocked outlet with continued input
- [ ] Fire exposure
- [ ] Heat exchanger tube failure
- [ ] Thermal expansion
- [ ] Cooling water failure
- [ ] Control system failure
- [ ] Runaway reaction (if applicable)
Determine which scenario produces maximum required relief capacity.
Step 3: Establish Design Criteria
- [ ] Set pressure (at or below MAWP)
- [ ] Allowable overpressure (10% or 21% for fire)
- [ ] Back pressure (existing and built-up)
- [ ] Temperature at relief conditions
- [ ] Required certifications (ASME stamp, etc.)
Step 4: Calculate Required Capacity
Using appropriate method:
- [ ] Liquid: Calculate GPM
- [ ] Gas/vapor: Calculate lb/hr or SCFM
- [ ] Two-phase: Use appropriate correlation
- [ ] Fire case: Apply API 521 methodology
Step 5: Size the Valve
- [ ] Calculate required effective discharge area
- [ ] Add safety margin (typically 10-25%)
- [ ] Consult manufacturer capacity tables
- [ ] Select valve with adequate certified capacity
Step 6: Verify Selection
Check:
- [ ] Adequate capacity at set pressure + overpressure
- [ ] Back pressure within allowable limits
- [ ] Body rated for system pressure and temperature
- [ ] Materials compatible with fluid
- [ ] Inlet/outlet sizes appropriate
- [ ] Mounting orientation acceptable
- [ ] Certified for code requirements
Step 7: Design Discharge System
- [ ] Determine discharge destination (atmosphere, containment, flare)
- [ ] Size discharge piping (minimize back pressure)
- [ ] Ensure safe discharge location
- [ ] Consider noise and thrust reactions
- [ ] Meet environmental regulations
Common Sizing Mistakes
| Mistake | Why It’s Wrong | Correct Approach |
|---|---|---|
| Matching pipe size | Pipe size ≠ required flow capacity | Calculate actual required flow |
| Rounding up excessively | Causes chattering, instability | Use 10-25% margin, not 2× |
| Ignoring back pressure | Reduces actual capacity significantly | Account for all downstream resistance |
| Using wrong fluid properties | Temperature/pressure affect density, vapor pressure | Use properties at relief conditions |
| Forgetting fire case | Fire often governs, especially for flammables | Always evaluate fire scenario |
| Neglecting multiple scenarios | Must protect against WORST case | Evaluate all credible scenarios |
| Assuming valve nameplate = capacity | Capacity varies with set pressure, back pressure | Use certified capacity tables |
Sizing Software and Tools
Hand Calculations vs Software
| Method | When to Use | Limitations |
|---|---|---|
| Hand calculations | Simple systems, single component fluids, preliminary sizing | Time-consuming, limited to simpler scenarios |
| Spreadsheet tools | Routine calculations, documentation | User must understand equations |
| Commercial software | Complex systems, two-phase flow, mixed fluids, detailed analysis | Cost, training required |
Recommended Software
Process simulation packages:
- Aspen Plus (with pressure relief utilities)
- ProMax
- HYSYS
Specialized relief sizing:
- API 520 calculators (various vendors)
- Pressure Relief Valve Sizing (PRV) by HTRI
- Manufacturer sizing tools (Emerson, Baker Hughes, etc.)
For simple cases:
- Excel-based calculators (many free versions available)
- Online calculators (verify with standard)
Regulatory and Code Requirements
ASME Boiler and Pressure Vessel Code
Section I (Power Boilers):
- Capacity = maximum steam generation
- Must have ASME stamp and capacity certification
Section VIII (Pressure Vessels):
- Relief valve required for all pressure vessels
- Capacity must prevent pressure exceeding MAWP × 1.10 (or 1.21 for fire)
- Certification required
API Standards
API 520/521:
- Industry standard for sizing methodology
- Required for process industry applications
- Covers all major scenarios
National Board Inspection Code
- Requires periodic inspection and testing
- Capacity verification required
- Recertification after repair
Pressure Relief Valve Sizing Checklist
Use this checklist for every sizing project:
System Information:
- [ ] Equipment description and tag number
- [ ] Design pressure (MAWP)
- [ ] Operating pressure and temperature
- [ ] Fluid composition and properties
- [ ] System volume/capacity
Relief Scenarios:
- [ ] All credible scenarios identified
- [ ] Worst-case scenario determined
- [ ] Fire case evaluated
- [ ] Required relief flow calculated
Valve Selection:
- [ ] Set pressure determined
- [ ] Allowable overpressure specified
- [ ] Back pressure calculated
- [ ] Required effective area calculated
- [ ] Valve size selected from certified data
- [ ] Adequate capacity verified
Installation Design:
- [ ] Inlet piping sized (minimize pressure drop)
- [ ] Outlet piping sized (minimize back pressure)
- [ ] Discharge safely routed
- [ ] Mounting orientation verified
- [ ] Supports and thrust restraints designed
Documentation:
- [ ] Calculations documented
- [ ] Valve datasheet completed
- [ ] P&ID updated
- [ ] Nameplate information specified
- [ ] Maintenance requirements noted
Frequently Asked Questions
Can I use a larger valve “to be safe”?
No. Oversizing causes operational problems:
- Chattering and instability
- Premature wear
- Poor sealing
- Use 10-25% margin maximum
Do I need to account for temperature effects?
Yes. Fluid properties change with temperature:
- Density affects liquid calculations
- Vapor pressure affects gas/vapor calculations
- Always use properties at relief conditions
How do I handle variable operating conditions?
Size for worst case:
- Highest required relief flow
- Lowest set pressure needed
- Maximum back pressure expected
- If wide variation, consider multiple valves
What if my calculation shows I need between standard sizes?
Always round up to the next available standard orifice size. Never round down—this provides inadequate protection.
Can I use multiple smaller valves instead of one large valve?
Yes, with considerations:
- Total capacity must equal or exceed required
- Largest valve should be ≥67% of total (ASME requirement)
- All must be set at same pressure (or within code limits)
- More complex piping and maintenance
Conclusion
Pressure relief valve sizing is a critical safety calculation that requires careful consideration of system conditions, credible relief scenarios, fluid properties, and applicable codes. Undersized valves cannot protect equipment, while oversized valves create operational problems and premature failure.
Key principles for successful sizing:
- Identify the worst-case relief scenario (often fire case)
- Calculate required relief flow using appropriate method for fluid type
- Account for all pressure losses (back pressure, inlet losses)
- Size valve to provide required capacity with 10-25% margin
- Verify selection against certified capacity data
- Design discharge system to minimize back pressure
- Document all calculations and assumptions
Following established standards (API 520/521, ASME) and using appropriate calculation methods ensures your relief valve will protect equipment when needed while operating reliably during normal conditions.
When in doubt, consult a qualified pressure relief specialist—the cost of proper sizing is insignificant compared to the cost of equipment failure or safety incidents.
Need assistance with relief valve sizing? Consult with certified pressure relief engineers or contact valve manufacturers’ technical support for application-specific guidance.