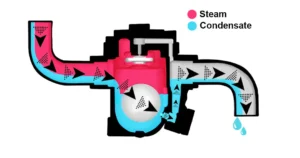
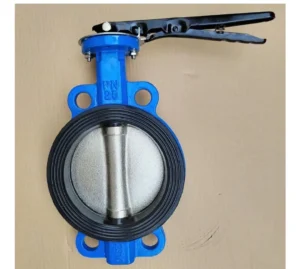
A rotary airlock valve is a precision instrument. Its ability to maintain a pressure seal depends entirely on the “gap” between the rotor vanes and the valve housing. If the clearance is too wide, air leaks through, destroying your system’s vacuum. If it’s too tight, the valve will “drag,” causing motor burnout or catastrophic metal-to-metal contact.

In this technical guide, we explain the standard procedures for measuring and adjusting vane clearances to ensure your rotary airlock feeder operates at peak efficiency.
1. Why Clearance Matters: The “Magic Number”
For most industrial applications, the industry standard for rotary airlock vane clearance is between 0.003″ and 0.005″ (0.07mm to 0.12mm).
The Leakage Factor: As the valve wears down over time due to abrasive material, this gap increases. A gap of just 0.010″ can double the amount of air leakage, significantly reducing the performance of your dust collector or pneumatic conveyor.
Thermal Expansion: If you are handling hot materials (e.g., fly ash or hot plastic resin), the rotor will expand. In high-temperature zones, clearances may need to be wider (e.g., 0.008″) to prevent the rotor from seizing against the housing.
2. Tools Required for Inspection
To perform a professional inspection of your rotary feeder valve, you will need:
Feeler Gauges: A full set of precision shims ranging from 0.001″ to 0.020″.
Dial Indicator: To check for shaft run-out or bearing wear.
Lock-out/Tag-out (LOTO) Kit: Safety First. Never inspect a rotary valve unless the power is physically disconnected.
3. Step-by-Step: Measuring Vane Clearance
Safety First: Disconnect power and ensure the hopper above is empty.
Access the Ports: Open the inspection panels or remove the valve from the line if necessary.
Insert the Feeler Gauge: Slide the feeler gauge between the tip of the rotor vane and the housing wall.
Check All Points: Measure the clearance at the top, bottom, and both sides. You must also check each individual vane (typically 6 or 8 vanes), as they may wear unevenly.
Check the End Plates: Don’t forget to measure the axial clearance between the sides of the rotor and the end plates.
4. How to Adjust the Vanes
Depending on the design of your rotary airlock, there are two ways to restore the seal:
A. Adjustable Tips (The Preferred Method)
If your valve is equipped with replaceable tips (made of rubber, polyurethane, or stainless steel):
Loosen the bolts holding the adjustable tip in place.
Slide the tip outward until it meets the required clearance (e.g., 0.004″).
Use your feeler gauge as a guide while tightening the bolts.
Rotate the rotor manually by hand to ensure there is no “rubbing” at any point.
B. Fixed Rotors (The Machining Method)
If your rotor is a fixed, solid-cast design and the clearance is too wide:
Replacement: In most cases, the rotor or the housing must be replaced.
Build-up Welding: Some specialized shops can weld-fill the vane tips and re-machine them to the original diameter.
5. Troubleshooting Common Valve Noises
Constant Hissing: A sign of excessive clearance. Air is bypassing the seal.
Rhythmic “Tink-Tink” Sound: One vane is slightly longer than the others and is making light contact with the housing. This requires immediate adjustment before the metal shards contaminate your material.
Heavy Grinding: Indicates bearing failure or a bent shaft. Shut down the system immediately.
6. Pro Tip: Don’t Forget the Bearings
Even a perfectly adjusted rotor will fail if the bearings are worn. If the shaft has even 0.002″ of “play,” the rotor will wobble, causing uneven wear on the rotary valve housing. Always inspect your seals and bearings during every clearance check.