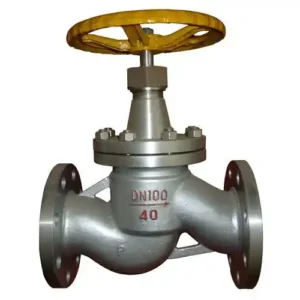
In piping engineering, the butterfly valve is celebrated for its lightweight design and efficient quarter-turn action. However, a significant percentage of premature valve failures—ranging from leaking seats to snapped stems—are traced back to incorrect installation orientation or ignoring flow direction requirements.

This guide covers the critical technical standards for installing butterfly valves to ensure a bubble-tight seal and a 20-year service life.
1. Does a Butterfly Valve Have a Flow Direction?
One of the most common misconceptions is that all butterfly valves are bi-directional. While many are, the “preferred flow direction” is critical for high-performance and critical-service valves.
Resilient-Seated (Rubber Lined) Valves
Most standard rubber-lined valves are bi-directional. They are designed to seal against pressure from either side. However, even in these valves, installing with a specific orientation can reduce the torque required to open the valve, extending the life of the actuator.
High-Performance and Triple-Offset Valves
These are almost always uni-directional or have a preferred flow direction.
The Seat Side: These valves utilize the system pressure to “energize” the seal.
The Rule of Thumb: The valve should be installed so that the upstream pressure pushes the disc into the seat. If installed backward, the pressure works against the seat, leading to bypass leakage and increased wear.
Pro Tip: Always look for the flow arrow cast into the valve body. If an arrow is present, it indicates the direction of the high-pressure side (upstream) to the low-pressure side (downstream).
2. Horizontal vs. Vertical Shaft Orientation
The orientation of the valve stem (shaft) can significantly impact maintenance, especially in “dirty” media like wastewater or slurries.
The Case for Horizontal Stem Orientation
In most industrial applications, it is recommended to install butterfly valves with the shaft in a horizontal position.
Why? In a vertical shaft orientation, silt, scale, and debris settle at the bottom of the pipe and enter the lower shaft bearing. This leads to abrasive wear and eventual seizing.
The Solution: With a horizontal shaft, the debris is flushed through the bottom of the valve as the disc opens, keeping the bearings clean.
When to Use Vertical Stem Orientation
Vertical stems are typically only used in clean liquid or gas services where space constraints make horizontal installation impossible.
3. Determining the Open and Closed Position
Properly identifying the butterfly valve open and closed position is vital for safety, especially during pneumatic or manual operation.
Parallel is Open: When the handle (or the flat on the stem) is parallel to the pipeline, the valve is Open.
Perpendicular is Closed: When the handle/stem flat is at a 90-degree angle to the pipe, the valve is Closed.
Visual Indicators: On pneumatic butterfly valves, always check the beacon indicator on top of the actuator. A “cross” symbol usually indicates closed, while a “flow line” indicates open.
4. Avoiding Turbulence: The “10-and-5” Rule
Butterfly valves are sensitive to turbulent flow. Installing a valve directly after a pump, a check valve, or an elbow creates “disc flutter.” This vibration causes:
Stem Fatigue: The rapid oscillation can snap the stem over time.
Actuator Wear: Pneumatic actuators will constantly “hunt” or vibrate, wearing out the seals.
The Solution: Follow the industry standard of 10D upstream and 5D downstream.
Leave a distance of 10 times the pipe diameter between the valve and the nearest upstream obstruction.
Leave 5 times the pipe diameter before any downstream obstruction.
5. Pre-Installation Checklist: Disc Clearance
Before tightening the flange bolts, you must verify Disc Clearance. Unlike gate or globe valves, the disc of a butterfly valve extends beyond the face of the valve body when open.
Check the Gaskets: Ensure the gaskets are perfectly centered. If a gasket hangs into the flow path, the disc will strike it, preventing full opening and damaging the seal.
Check the Pipe ID: In some heavy-wall pipes or lined pipes, the internal diameter may be too small for the disc to rotate freely. Always “dry-cycle” the valve to 100% open before final torqueing.
Conclusion
Correct installation is the difference between a valve that lasts 20 years and one that fails in 6 months. By ensuring the preferred flow direction is respected, the shaft is horizontal for debris-laden media, and the 10-and-5 rule is followed, you protect your system from vibration and leakage.