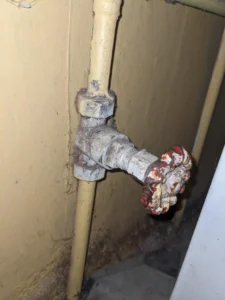
A foot valve is a check valve installed at the bottom of a well’s suction pipe. Its job is to prevent water from flowing back into the well and to keep the pump primed. When it fails, your pump may lose prime, short-cycle, or draw in air. Replacing the foot valve restores proper water flow and protects the pump.
This guide explains how to safely remove, replace, and reinstall a foot valve in both shallow and deep wells.
Table of Contents
Toggle✔ Tools & Materials You Will Need
New foot valve (same size as existing one)
Pipe wrench or strap wrench
Teflon tape / pipe thread sealant
Pipe clamps
Safety rope (for securing the drop pipe)
A helper (recommended)
Bucket or container
PVC or galvanized coupler (if needed)
✔ Safety First
Before beginning:
Shut off power to the pump at the breaker.
Ensure you have a firm grip on the drop pipe, as dropping it into the well can be costly.
Work with at least one other person, especially on deep wells.
Step-by-Step: How to Replace a Foot Valve
Step 1: Disconnect the Suction Line
Locate the suction pipe that enters the well from your jet pump or system.
Shut off the pump and close any shut-off valves.
Loosen the union or pipe joint that connects the suction line.
Position yourself where the drop pipe can be safely lifted out of the well casing.
Step 2: Pull the Drop Pipe Out of the Well
This step varies by well depth.
✔ Shallow wells (25 ft or less):
Pull the PVC or poly pipe out by hand.
Lift slowly and keep the pipe straight.
✔ Deep wells (over 25 ft):
Two people should pull the drop pipe section by section.
Lay the pipe lengths on the ground carefully.
Support the pipe so none of the weight is on the pump fittings.
Important:
Do not let go of the pipe. Tie a safety rope to prevent accidental loss.
Step 3: Remove the Foot Valve
Once the bottom end of the piping emerges, you will see the foot valve.
Hold the pipe securely.
Use a pipe wrench/strap wrench to loosen the old foot valve.
Remove the valve and inspect the pipe threads.
If the pipe end is cracked or damaged, replace the fitting before continuing.
Step 4: Install the New Foot Valve
Apply Teflon tape (wrapped clockwise) or thread sealant to the threads.
Screw on the new foot valve by hand.
Tighten with a wrench—secure, but not excessive to avoid cracking plastic components.
Make sure the valve is aligned so the flow direction arrow points upward (toward the pump).
Step 5: Lower the Drop Pipe Back Into the Well
Reverse the process:
Carefully lower the pipe back into the well casing.
Keep it straight to avoid scuffing seals.
For deep wells, reconnect each section piece by piece.
Use caution to avoid hitting the new foot valve against the well casing.
Step 6: Reconnect the Suction Line to the Pump
Tighten unions or couplers securely.
Ensure all joints and fittings are sealed.
Step 7: Prime the Pump
Your pump needs to be primed before restarting:
For jet pumps:
Open the priming plug.
Fill the pump housing with water until full.
Reinstall the plug.
Turn on the pump.
The pump should build pressure normally if the new foot valve is sealing properly.
Step 8: Check for Leaks and Pressure Stability
After the pump runs:
Watch the pressure gauge.
Ensure pressure holds when pump shuts off.
Check for air in the system or sputtering taps.
If everything is stable, your new foot valve is working correctly.
✔ Tips for Long Foot Valve Life
Use stainless steel or high-quality brass foot valves in sandy or corrosive wells.
Install a well screen to reduce debris entering the valve.
Regularly check pressure drop behavior for early signs of failure.
Conclusion
Replacing a foot valve in a well is a straightforward process when done carefully. By removing the drop pipe, swapping the old valve, and re-priming the pump, you restore reliable flow and protect your pump from damage.