A running toilet is more than just an annoying sound at 2:00 AM—it can waste up to 200 gallons of water per day, leading to a massive spike in your utility bill. The good news? You don’t need a plumber. 90% of toilet leaks are caused by two simple components: the Fill Valve or the Flapper.
This comprehensive guide will show you how to diagnose the problem and fix it in under 15 minutes.
I. Diagnosis: What’s Causing the Leak?
Before buying a toilet repair kit, you need to identify the culprit. Open your toilet tank and perform the “Dye Test”:
The Flapper Leak: Drop some food coloring into the tank. If color appears in the bowl after 10 minutes without flushing, your toilet flapper is worn out and needs replacement.
The Fill Valve Issue: If water is constantly running into the overflow tube, your toilet fill valve is either adjusted too high or has a faulty seal.
II. How to Fix a Faulty Toilet Flapper
The flapper valve is the rubber seal at the bottom of the tank. Over time, chlorine in the water causes the rubber to warp or become brittle.
Step 1: Turn off the water supply and flush to empty the tank.
Step 2: Remove the old flapper from the pegs on the flush valve.
Step 3: Install a universal toilet flapper.
Pro Tip: Ensure the chain has just a little bit of slack. If it’s too tight, the flapper won’t seal; if it’s too loose, the toilet won’t flush completely.
III. Replacing the Toilet Fill Valve (Step-by-Step)

If the water won’t stop filling, or you hear a high-pitched “hissing” sound, it’s time for a toilet fill valve replacement.
1. Choose the Right Type
There are several types of toilet fill valves:
Plunger/Piston Type: (Old school, noisy)
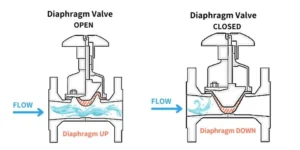
Diaphragm Type: (Common in older toilets)
Float Cup (Recommended): The most modern and reliable toilet fill valve style, used by brands like Fluidmaster.
2. The Replacement Process
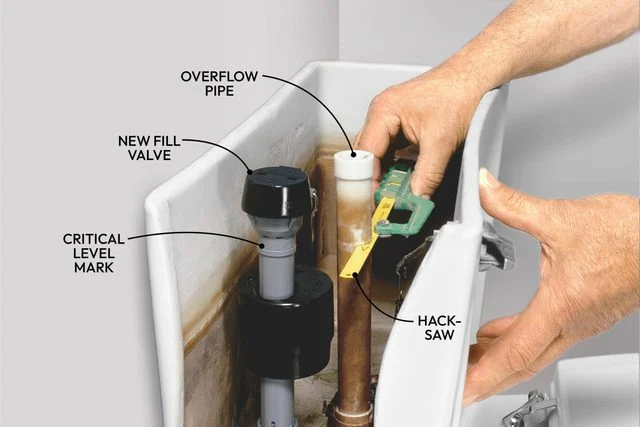
Drain the Tank: Use a sponge to soak up the last bit of water.
Disconnect the Supply: Unscrew the water supply line and the locknut under the tank.
Adjust the Height: Most best toilet fill valves are adjustable. Set the height so the critical level mark is at least 1 inch above the overflow tube.
Connect the Refill Tube: Clip the small tube to the overflow pipe to ensure the bowl refills correctly.
IV. Maintenance: How to Clean a Toilet Fill Valve
Sometimes, a “broken” valve is just dirty. Cleaning a toilet fill valve can save you the cost of a replacement:
Turn off the water and remove the top cap of the fill valve.
Place a cup over the valve to prevent splashing and turn the water on slightly to flush out debris/sediment.
Check the fill valve seal for tears. Often, just replacing the fill valve gasket ($3-5) is enough to stop a leak.
V. FAQ: Common Toilet Troubleshooting Questions
Q: What is the most reliable toilet fill valve for high pressure? A: Look for a valve specifically rated for high-pressure systems with a reinforced fill valve seal to prevent “water hammer” or slow leaks.
Q: Can I use a universal toilet repair kit? A: Yes, most modern toilet repair kits are designed to fit standard 2-inch and 3-inch flush valves, making them compatible with 95% of gravity-flush toilets.